Tip:For the Expecting Mom – Bra Extenders

Bodice of McCall's 6119 Halter Top.

All of this talk of boobs and bustiness during my fitting of McCall’s 6119 Halter Top has got me to thinking about something that has helped me greatly throughout my pregnancy.

Beginning early in my pregnancy anything binding my torso increased my already agonizing nausea.  Bras that previously felt just fine were now cutting into my rib cage and adding to my misery.  Still unsure of how much more I might increase in weight and girth, I feared having to buy several whole new collections of brassieres as I moved through the trimesters.

I can’t remember which pregnancy book I read this in, but I am thankful that another woman passed this useful FYI along.

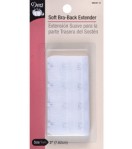
Bra Extenders.

Bra Extender

I remember associating these with the matrons of my youth, who often wore unalluring housedresses and industrial strength bras.  That’s why I glance over them on the notions shelf.  I assumed that anyone who might need one of these little numbers was definitely not in the childbearing stage of life.

Not so.

Needing money to pay off the OB/GYN fee rather than retooling my lingerie drawing, I decided to try out this inexpensive suggestion first.  I bought four.  (Good thing because I have lost two already.)  I went to Hancock’s but I have seen them at JoAnn’s also.  They come in 2,3 and 4 hook variations to match the back closures of your bra.  (There might be a five hook one too that I have seen.)

Absolutely unglamorous items, but they give terrific results.   The nausea was still present but at least my clothes weren’t making it worse.   Lingerie is expensive and I was saved from having to buy a whole new collection of bras for each size increase during my pregnancy.

I am so thankful to whomever passed this along to me that I wanted to share it with other moms-to-be as one of those small things during my pregnancy that has turned out to be a huge help.

Practicing Pintucks and Intuition Pays Off:Great Thrift Store Finds

This is the chest of drawers in my bedroom.  My husband wonders why he can’t put his t-shirts and socks in it.  That’s because it is storing my quilting fabric.  I have to empty at least two of these drawers to make room for baby clothes.

Why not pull the fat quarters and use them to practice some embellishment techniques that I have never quite mastered?

Right now I am practicing pintucks and other tuck variations, a technique I often find annoying as the results on garments can often go wonky no matter how carefully one has marked.   I also grabbed an Eleanor Burns quilting manual, pulled some compatible pieces from the chest, and began working up the material a few quilt blocks at a time.  I made as many blocks as I could out of my first little stack of material, and I have my next set sitting on the corner of my sewing table. 

Quilting is such a nice break from garment sewing and gives you some perspective.  After finishing the one Monkey’s Wrench block I wondered why I have been putting off sewing a pair of capri’s, already cut out, just because they have a pocket detail with which I am unfamilar.  If I can piece a quilt I should be able to handle that pocket.

My pintuck experiments and quilt blocks. The one with the red squares going diagonal is Jacob's Ladder and the one at the top right is Monkey Wrench. I also made two other blocks of the leftovers, they aren't formal quilt patterns, but I will use them somehow.

Wednesday morning something just told me to go to my local thrift store.  Intuition paid off.  I originally needed some more sheeting for practice muslins.  That’s the reason I told my husband I was going.  But I just knew in my gut that today better offerings were to be had. In the craft aisle I found several sewing patterns specifically for nursing moms! Wow!  I have never seen nursing patterns before and I am eager to sew up some practice pieces.

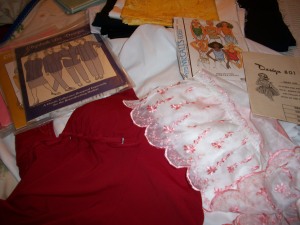
Patterns for nursing moms! I am so amazed. I have never seen such patterns before. To make the find even more joyous, all five are uncut and sold for a quarter. 🙂

I also found a set of curtains with adorable trim which will be extra special on one of my daughter’s dresses.  I might even use the clear nylon as lightweight interfacing.  A few more patterns turned up in the craft aisle, and I am dismantling the bathing suit top for the bra cups inside.  

My pile of thrift store goodies. The pile of fabric in back is not from the thrift store. Banasch's had a 50% off sale and practical me bought fabric for school uniforms. It is hard to believe, but in July I am going to have to start thinking about getting my daughter togged out for school.


Altogether a very satisfying thrift store run.  My total expenditure $9.06.  The fun I had, as the credit card company broadcasts – priceless.


Why my Collar is Sticking Out like Bird Wings: Notching the collar seam

Previously I have posted a pattern review of McCalls 5754 Poncho/Cape and said that I had plans to make another in wool.  I cut the project out and then it lay in my UFO sewing basket until December.  Originally I had planned to have it done in time for fall and I am annoyed with myself that it won’t be appropriate until next fall, but better late than never.

Once upon a time I had the original photo I showed my foster sister, of the collar sticking out, but it must have been inadvertently deleted during all of the Christmas picture-taking.

So I sewed it up and then found something else to be annoyed about.  The collar stuck out like wings from my neckline.  Thankful to live in the post-modern era with deluxe technology I snapped a pic with my digital camera to show my foster sister.  (This really beats dragging the offending garment back and forth for her to see. Because I was raised by my great-aunt and uncle, my foster sister is much older than myself and also happens to be an excellent seamstress who had stopped sewing around the time I began.  I thought for sure she would have a fix-it.)

Expecting consolation, I show her the image on the digital. 

“Your collar is too tight,” she says flatly.

Not exactly feeling validated, I begin to make my case. 

“It can’t be too tight.  It is a plus-size.  The neckline is actually a bit too large for me.  I NOTCHED!”

“Your collar is too tight.  Get into it and loosen your collar.”

I begin to wail piteously, “But I have already bagged and closed up the lining.  I notched!  Well, it went kind of straight-like at that part of the collar and I didn’t notch a lot there.  But I’ve already bagged and closed up the lining!”

My sister looks me blandly in the eye and says, “Uh huh, get into it and loosen the collar.  It’s too tight.”

So much for a fellow sewist’s sympathy.    How could she be right?  What a bummer thing to have to rip back part of the lining.  Aarrgh!  I mean I notched.  How many notches did this thing feel entitled to?

Apparently a lot.

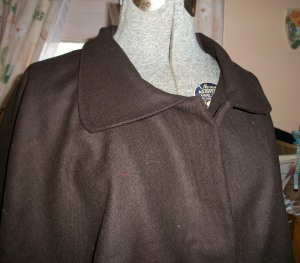
Over the next few weeks I kept looking at the cape on the mannequin and wishing the solution lay elsewhere, but after some thought  decided she had to be right.  I ripped out my hemstitched lining opening, turned the cape inside out, and notched the collar again.  The collar and facing are both woolen.  That made for a thick seam in the front area where the cape closes.  I notched one side every inch, and then staggered my notches for the other side.  It worked.  The collar now falls as it should.

This is what I mean by staggering the notches on the collar raw edge.

Thick fabric means a thick seam, which means more notching than you might normally do. My advice is to check out the lay of the collar before closing the lining.

The collar now lays against my shoulder as it should. It turns out I made the fix more tedious in my imagination than it was in reality. It took only about 15 minutes.

Next Post: Thursday, January 20, 2011:Starting on my Spring Sewing Resolution

Hemming Jeans:A Tutorial

I know a lot of us are going to be receiving jeans as Christmas presents and for many of us those jeans are going to be too long.  And not just a little.  For us to even walk about something will have to be done.

If you frequently buy super expensive jeans, you know the ones that cost 3 digits $$$– get thee to a proper seamstress.  A shop will have thread that matches your jeans exactly and you won’t be sweating a possible mess up on a luxury item.

But for those of us who buy jeans of a more practical variety, and depending on your frequency of wear, a basic sewing machine may pay you back in alterations bills. For those with even a mild interest in sewing jeans hemming is well within reach.  If this is the only sewing project you ever learn you will be doing yourself a huge favor.

What you will need

A basic sewing machine and working familiarity with it.  Meaning you know how to thread the machine and wind the bobbin.  You understand that stitch lengths go from very short to very long.  You have successfully worked with your tension to create a passable line of stitching.  You can use the stitch guides on the throat plate so your stitches are straight.

Thread that matches, at least somewhat, the topstitching on the jeans.  Special jeans topstitching thread is available, but for most projects, I use regular thread in the light brown – rust color variance.

Sewing machine needles that will cut through tough denim.  Schmetz makes special needles just for denim n various sizes.   In a pinch I have also used embroidery or universal needles at the 90/14 size.

A bunch of jeans that you don’t mind making mistakes on.  The best source for these is a thrift store.  Trust me, however bad you feel about screwing up thrift store jeans, you will feel loads worse ruining your $75.00 pair.  Twenty dollars of jeans used for practice may save you tons in alterations costs later on. 

These are the steps I take to hem my jeans.  I have done it a gazillion times.  It does work with a little practice.

 And now for you adventurous souls, let’s be on our way.  

1.) The jeans are too long for my taste.  I am using a pair of shoes with a middling heel.   I don’t mind if my jeans are a little long for flats, but I abhor too short jeans with heels.
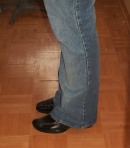
2.) Fold up the hem at the desired length.  This may take a few tries.  I err on the side of overlong because I have mistakenly hemmed too short in the past. 

3.) Pin the hem so you don’t lose it when you take the jeans off.

4.) Measure your desired hemline.  The fold is where you want your new hem.  The turned up bit is what you have to work with to make your hem.  My jean hems are usually ½ inch.  I need two of those ½ inch widths so I can complete the folded over hem (1/2 inch on the inside of the fold, ½ inch on the outside). So you would measure one inch or so from the fold.  Any more is excess.  (You can see that my measurement is 1 ¼ inch.  I went ahead and kept that extra ¼ inch.)
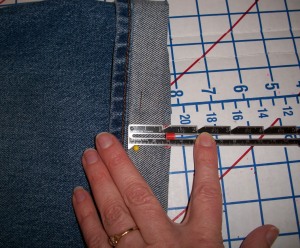
5.) Cut away your excess.  On these I decided to just cut away the previous hem.

6.) Choose your thread color and sewing machine needles.  I am using Coats and Clark general sewing thread in a color that matches the jeans topstitching.  I am also using standard Universal 90/14 Schmetz needles as I know from past experience that they will work through denim, at least for the short time I will need them sewing just a hem.

7.) Choose a long stitch length.  The illustration on the machine stitch length dial (marked C pointing up) shows the length you are aiming for.  The reason you are choosing a longer stitch length than normal is because that thick jean fabric is going to eat up your thread.  Thicker fabric has more length of thread sitting within the fabric making for a shorter stitch on top.  This is all hard to explain.  But too short a stitch on jeans will drive you crazy.

8.) Use your freearm if you have one.

To access your freearm see if there is a section of your sewing machine that can be pulled away to make a smaller bed. That way you can get the short circumference of your jeans around your machine making them easier to sew.

9.) 3/8 – ½ inch into the hemline make a staystitch line.  There are no folds on my jeans yet.  Just a line of stitching along the bottom bare edge.
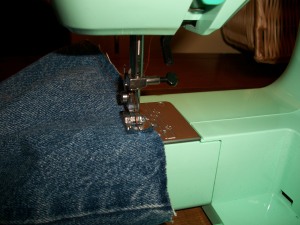
10.) Cut away any bulky seams best you can under the staystitch line.
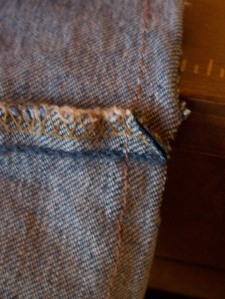
11.) Turn your jeans inside out.  Many times I do my topstitching from the outside where I can see, but on jeans I use the inside. Using your staystitch as an arm to fold over upon turn your jeans hem under the machine as you sew.

!!!! POTENTIAL PROBLEM!!!! When your reach the bulky side seams, slow down.  Turn the needle by the handwheel if you have to.  You may also have to push and pull the fabric along a bit.  If you hear your machine sounding harsher, or like it is straining, STOP.  Gently start again with the handwheel and kick in the pedal when you are over the worst of the hump.  If you have a jam, don’t force it.  Pull out the jeans and cut the thread.  If you can’t get over the side seams you do have the option of sewing up to that seam, skipping the bulky portion, and beginning again on the other side.  I don’t often use this method, but some denim can be incredibly thick and unworkable.

12.) Iron your new hemline down for crispness.

Now check in the mirror.
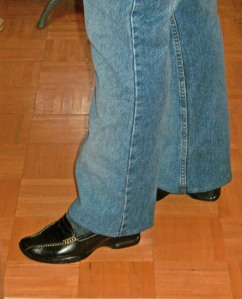
These jeans are now at an acceptable hem point for me. Long enough for a slight heel without dragging the ground.

At this point, ask yourself some questions.

Is this the length that I want?

Is my topstitching compatible with the overall look of the jeans?

If the jeans look wonky, is that because of my sewing technique, or is it something funny about the length.

If the sewing details are off, take a practice pair of jeans and just keep cutting hems up the pants leg until you have the technique down.  For example, each person has to work out their own way of getting past that huge bulky seam.  If your stitching is uneven or comes loose, practice technique.

If you jeans are the wrong length, are they too short or too long?  My tendency is toward such exactitude that I get the hemline too short.  Standing still the pants look fine but they ride up a bit with movement raising the hemline to undesirable heights.  Knowing my proclivities I often add an inch to my pinned hem.  You may have the opposite tendency of allowing too much hem.  The only way to know your own tendencies is to hem.  Find several pair of dirt cheap thrift store jeans and practice. 

At first it seems like a lot of work, but after a few practice pairs you can successfully hem a pair of jeans within twenty minutes.  What used to be a chore is now one of the easiest sewing projects I do, in less time than it would take me to drive to the alterations shop.  After about six pairs you will be fearless even in the face of three-digit-dollar jeans! 

Next Post: Tuesday, December 28, 2010:  I am taking a few days off for the Holidays to visit family.  I’m sure after all of that food and family I will be eager to get back to my machine.  Looking forward to showing you what new things I have done.

Tidying up the Unfinished Edge of a Hemline, or Getting Ready to Hem: A Cheater’s Method

When I was a beginner I wondered what to do with the raw edge of fabric at the hemline.  Most often when I got to the end of my side seams there would be a tiny portion hanging over at the bottom. 

A typical bottom edge mismatch for me on shirts.

As a new sewer I did ask for a solution, but my advisors, both in person and in book format, sidestepped or just didn’t get it.  

The first advice I was given at the time was to measure my hem from the floor, mark, cut and then sew.

Problem: Seeing my hemline accurately was hard when it was slightly uneven.  I was then told if I had sewn the garment correctly the seamlines at the hem would not be uneven.  I think I was getting this admonition from ladies who mainly sewed aprons.  They sidestepped. 

Result of taking such advice: Guilt and I still had my initial problem.

Next piece of advice:Mark your hemline from the unfinished edge. Problem: If you mark your hemline from an unfinished edge that is uneven, you get an uneven hem. They didn’t get it.

Result: I got dorky looking hems.

I find this maddening as this is the kind of stuff that trips up new sewers.

I did not know it at the time, but my garment was not ready to hem.  I have never seen it in a book, or even read in any manual or magazine, but tidying  your raw edge is an actual step before hemming.

All those photographs of perfectly even raw edges being hemmed in manuals, someone has evened the edge before photography began!

Though my method is hardly sacred sewing technique, I am going ahead and offering it as I wish someone had given me some kind of solution when I was a new sewer.

It looks haphazard but I am using the accurately sewn (I hope!,) garment itself as the base.

[My only caveat:  If I found a huge seam mismatch, say five inches, I would not do this.  If you have a huge gap at the bottom, dear reader, please retrench and abandon this technique I am showing, because it won’t work to correct that situation!]

 But the unevenness I typically experience is not enough to worry about, by that I mean it won’t affect the hang of the garment.   The photo at top shows a mismatch of one inch or less.  This technique will work on a simple shirt hemline or a basic non-back-vented skirt.  I am going to use a shirt to illustrate.

 * Fold up the garment so the side seams are together exactly.  For example, with a shirt I lay the side seams atop one another, match and pin the armpit. 

Here I am flattening and pinning my front bodice. You can see the pins on the button front. The back gets a bit scrunched when you do the front. After cutting the front even, repeat with the back, flattening and matching up seams.

* Pin again at bottom if the fabric tends to shift. 

*Make sure the back and front bodice are divided equally in half.  If there is a collar or button placket it is easy to lay those seams atop one another and make a perfect match.  Skirts are handled the same way using the waistband or yoke and side seams as your match points.

*Take a deep breath, because every sewer knows once its cut its gone, and carefully take your scissors and tidy that seam. 

The uneven portions coming off the bottom raw edge. See that front placket. Now there will be no mismatch at bottom as long as you hem as evenly as you have cut.

Because it is back to back, front to front and the garment is folded in half exactly the right and left sides of your unfinished edge should match.  One side should not hang lower than the other.

* Now I am ready to mark my hem, on a new pattern, or sew it up for a TNT. 

Why do you need to tidy your raw edge before hemming?  To get professional looking results. Though this method looks a little funky in the picture, like it could never come out even, before I started doing this step, it was my shirt hems that were funky and uneven.  If you are a newbie having the same issues with this as I did, I hope this helps!

Next Post: Tuesday, November 30, 2010: Even I am going to be surprised as I haven’t chosen a topic yet!

Flat Assembly Method for Attaching A Sleeve with a Cuff, or How to Avoid a Set-In Sleeve on a Standard Shirt

Flat Assembly Method for Attaching A Sleeve with a Cuff: If a cuff and sleeve placket are involved you have to construct a set-in sleeve.   So I have been told.

Rebuttal: No you don’t.

Others who love to set-in a sleeve can do so to their hearts content, but for me, it is flat assembly whenever possible.

My hatred of the set-in sleeve engendered this little brainstorm.  Those of you handy at sewing blouses may already be doing this, but if you are, then there are a lot of us home-sewers at our machines using this technique and the pattern companies and sewing manuals are completely in the dark. 

Here is a run-through of the covert operations.

1) I sew my bodice, but of course, do not sew up the side seams.

2) I take my sleeve and sew the placket

Now here is where I part ways with most sewing manuals.  Most pattern instructions tell you:

  • sew the underarm of the sleeve
  • sew the side seams of the bodice
  • attach the two using a set-in technique
  • then attach the cuff to the nearly finished shirt.

The instructions tell you that because there is a physical fact of cuffs that must be dealt with.  Plackets do not lie in the side seams.  Most of the time the placket is a cut into the body of the sleeve.  The cuff does not go from side seam to side seam – it runs from placket opening to placket opening.  

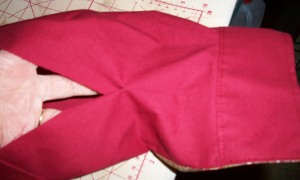
Here you can see the cuff encloses the underarm seam and instead runs from placket opening to placket opening. The placket is not part of the underarm seam, it is a separate cut into the body of the sleeve.

Therefore the underarm seam must be sewn and finished before applying the cuff.

Or must it?

Must we sew the entire underarm seam?

I don’t.

3) Instead, I sew only three to four inches of the underarm seam coming up from the wrist. 

I sew three to four inches of the underarm seam closed at the wrist and then attach the cuff down to finishing details like topstitching and buttonholes. I leave most of the underarm seam open.

 4) Attach cuff: I don’t have to drag an entire blouse behind me as I attach the cuff. I attach it right then and there working with just the sleeve itself.

5) Sew sleeve to bodice: The wrist portion is in the round, but the sleeve cap is flat. I do flat assembly to the bodice shoulder. (One word of warning – As your sleeve has this cuff dangling from the end it can be harder to see right sides. Double and triple check you are right sides together at the shoulder and sleeve cap. )

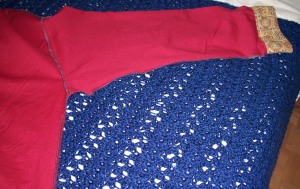
Sleeve sewn into armscye flat assembly.


Here is what it looks like from the right side. You can see the completed cuff that is in the round and the flat shoulder seam with the upper underarm seams left open.

6) Now I have only to sew up the rest of the underarm and the bodice sides.  Sometimes there is a little discrepancy in fabric lengths.  At those times I decide between three solutions:

  • Using the feed dogs to ease excess.
  • Living with a tiny mismatch at the underarm.
  • Going ahead and taking some excess in at the armpit part of the armscye.  (Most often I don’t have to go this far.)

I sew from the joined portion at the wrist to the armpit and down the side seams.

This method has allowed me to have my cake and eat it too.  I can have flat assembly and still create standard oxford style shirts which I used to avoid for fear of the set-in.

Does anyone else use this method? 

Next Post: Tuesday, November 22, 2010: Vogue 7700 Basic Oxford:Pattern Review

How to Draft a Sleeve Pattern When You are Desperate and No One Has Ever Shown You

How to Draft a Sleeve Pattern When You are Desperate and No One Has Ever Shown You.

Simplicity 3786

We home-sewers are always going it alone it seems.  When constructing Simplicity 3786 I found I liked the bodice but the sleeve fit was abominable.  I would need to draft a new sleeve pattern.

The problem is that no one has ever shown me how

Prior to my sewing snit over this sleeve I had heard two solutions but I could not see either working.

Solution #1;Looks Like a lot of Work for a Sleeve that Still Might Fit

Butterick 5746:Fitting Shell or Personalized Sloper

There are pattern drafting books that cover drafting sleeves. However, their sleeve patterns are drafted from a personalized bodice pattern, often called a sloper.  Slopers are usually very form-fitting, more a carbon copy of you with some ease thrown in for movement.  Additionally, the sleeve drafting is explained in a separate chapter and there are no illustrations of the relationship between the sleeve cap and the curvature of the bodice shoulder. 


Solution #2 Which I Think Only Works if You Make the Same Kind of Shirt All the Time

I have also been advised to take my French curve and measure the armscye curvature on a blouse whose fit I like best.  But then there is the problem of matching sleeve to shoulder. Because I like a certain blouse does not mean that the pattern I am currently sewing was designed with the same curvature and fashion ease. Just a glance in the closet tells you that garments each have their own unique curvature at the armscye.

So what to do?

Here is what I did. 

It won’t win me any ribbons at a contest I’m sure, but it worked.

This design had a flat sleeve head.  By that I mean it had no gathers and minimal ease.  That made what I did easier.

Simplicity 3786:The sleeve from the pattern envelope. You can see how tightly it fits. Nothing I did to alter the original pattern worked.

1) I seam ripped the sleeve from the pattern company and threw it in the scrap bin. (That kind of made up for the previous night’s snit over the sleeve’s general chumpiness.)

2) I also ripped out the side seam so I could lay the bodice flat on top of a large piece of paper.

Then I winged it.

If you have sewn a lot of sleeves you will notice some commonalities.  The deepest armpit portion is curved away from the sleeve cap. A few inches in from the side seam there is usually a notch.  Any easing or gathering takes place between the notches most of the time at the sleeve cap. 

SOOOooooo. . . . . .

3) I put on the sleeveless shirt and got the shoulder seam and armscye I wanted.  Cutting and pinning until I got it right.

4) Then I laid the garment completely flat over a large piece of interfacing.

Shirt laid open over interfacing. Mark your notches, remember one notch for the front, two for the back, then trace the curve for the sleeve cap.

5) I guesstimated where the notches should be on my new armscye.  I marked both the interfacing that was to be my new sleeve and the bodice.

6) I traced the top portion between the notches, the sleeve cap, directly from the bodice.

Flip the garment over and trace the underarm curve portion. Remember to mark where the seam ends, that will become the underarm seam for your sleeve.

7) Next I flipped the bodice over, matched the notches and traced the armpit curve using the bodice as a guide. 

Remember to make a slash where the curve ends and the side seam begins.  That becomes the underarm seam of the shirt.

My new sleeve cap. I just had to tidy up the lines and draw the seams.

I had my sleeve cap.  From there I just needed to decide how long I wanted it.  Since Simplicity 3786 has a three

The sleeve not fit with the looseness it was designed to have.

part sleeve, I took the pattern for the cuff and gathered lower sleeve and altered them to fit my new upper sleeve.

I realize that this isn’t by the book, but if I had a book to show me how to redraft a sleeve for an existing pattern I wouldn’t have had to make this up.  You must consider the variables of your specific pattern and you must make a practice sleeve, but this a quick and dirty method that may be of help if nothing but a new sleeve pattern will work.

Next Post: Friday, November 19, 2010: Week Ten- I Can’t believe it! – Stash Bash Update

Further Menswear Design Details:Where is All of the Interfacing?

“But Hell, sleek Hell, hath no freewheeling part.”

XJ Kennedy from the poem “Nothing in Heaven Functions as it Ought” @1985

Home sewers have been told for years, interface, interface, interface.  At a sewing convention I once heard a pattern designer mention going without and the room erupted into a general flap and gurgle of protest.  Yet pairing the correct interfacing to fabric is quite tricky and often home-sewn collars and cuffs look too stiff in comparison to their RTW counterparts.  Still most sewing manuals and pattern instructions are staunch: they have women interface collar, cuffs, both sides of plackets, pocket edges and yokes.

It turns out this advice may be straight from hell.!!!!!!!!!
All of the overly-stiff collars, cuffs and front bands I have sewn have been hell for sure.   And they certainly weren’t freewheeling by any measure.

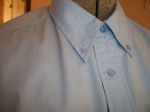
Imagine my astonishment when I took a hard look at my husband’s shirts.  I even held them up to the sunlight.  No interfacing.  The majority of his shirts are heavy cotton button-down oxfords – there isn’t a lick of interfacing in those things!  Apparently the weight of the cotton is enough.  Contrary to the warnings of various sewing manuals, sans interfacing, his shirts don’t look shabby; they look right.  (It’s my stuff that looks shabby when it is interfaced out the whazoo!)

I kept massaging this thing to make CERTAIN that there was no super-thin interfacing inside. (My husband wishes he got this kind of attention 😉 But like most of his work shirts this one went about its day looking completely presentable sans interfacing.

The dress cotton shirts had interfacing at collar, cuff and buttonhole side of front opening. The yoke was not interfaced, nor the side of the opening with the buttons.  The dressiest shirt with the softest fabric was not interfaced at all.  If the manufacturer had followed the instructions given the average home sewer that piece would have “needed” the most interfacing for support.  But it looks and feels better without it.

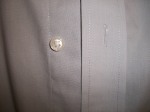
One of my husband's dress shirts in a very soft fabric. I pulled the front bands inside out and was surprised that there was no fusible interfacing. The material acted as its own interfacing.

Such loosey-gooseness of fabric parts would not have been tolerated by my early sewing instructors.  But in comparison to the rigidity of fabric and advice I have endured, following the manufacturing example just might be heaven.  Apparently men’s’ clothiers don’t waste money purchasing the stuff, nor do they want to pay someone to cut and fuse it – if there is no need.

Menswear manufacturers churn out a gazillion shirts, most of them so comfortable that they are readily purloined by wives and girlfriends.   They must know something. 

I think home sewers are being told to over-interface.  Isn’t it only the top lap of the placket that needs interfacing since it is showing?  Collars and cuffs have to “stand” and they may need the extra stiffening, but do yokes need to be stiff?  Is interfacing both bands of the front opening what is making your shirts look too unbending?  If the material is already hefty, does it need interfacing, or is that going to be overkill?

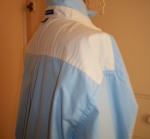
Some of my husband's oxfords used denser material for facings in a pleasant contrasting color.

Home sewers are told to interface both sides of a shirt opening thereby treating them both equally. But is that necessary? Does doubling up the interfacing when you lap the shirts closed make the fronts unbending instead of finished? This shirt has only the buttonhole side interfaced which makes sense. The button side is soft and un-interfaced.

Next time I sew a cotton shirt I am going to think more critically about whether or not I need interfacing irregardless of the pattern instructions and the imagined tight lips of disapproving ladies of my past.

I am going to be freewheeling as the song says!

(Or is that freefalling?)

I never get my songs right:)

Next Post: Tuesday, October 19, 2010:Butterick 3457 Pintuck Blouse:Pattern Review

Design Details from Menswear Shirting:Topstitching

Shirting Details from Menswear:

Topstitching

Warning:This Post is Photo Heavy.

Often when a pattern instructs me to topstitch I just look at the garment and wing it.  Though it would only take a few seconds I have been too lazy to grab a shirt or two and measure the typical topstitching points to determine stitch depth.   The result is sometimes a shirt that subtly looks “wrong.” 

I have several shirts planned over the next few months and I want them to look nice.  Wanting to create a handy chart to place in my sewing area as a reference I decided to pull out a few of my husband’s shirts and measure the stitch depths. 

Why my husband’s shirts and not my own, you may ask.  Firstly, being thick in the middle I do not own many RTW women’s oxfords to use as a sample.  RTW won’t close around my waist. That is why I am sewing my own.

Secondly, menswear often sets the standard for women’s oxford-style shirts and after an in-depth look at my husband’s closet I realized that menswear manufacturers have it down to a science.  My husband owns essentially the same exact shirt in a variety of fabrics and colors.  Though we in the Western world are coming upon close to two centuries of men wearing a cotton collared shirt, strangely I didn’t anticipate how efficient and frugal men’s clothiers had become.

Here is a chart of my findings. 

I worry that the chart will come up too small so I will repeat the chart info with photos to illustrate.  I looked at three different types of shirts: a standard work oxford, a dress shirt of finer cotton, and a dress shirt of softer material.  There was very little variation in construction methods or design details.


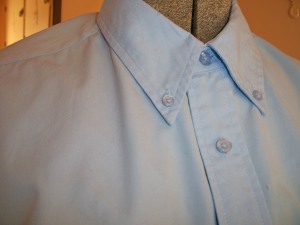
The softest and dressiest shirts had edgestitched collars.

Most of the shirts had 1/4 inch topstitching at collar edges.

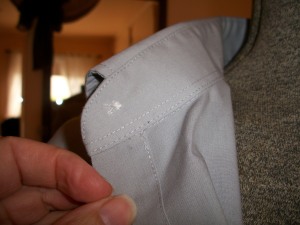
The inside of the collar band showed extra stitching at 1/4 inch. But it couldn't have been twin-needle-d because the 1/4 stitch line did not show on outer side.

The outside of the collar band is edgestitched.


The yoke front and back are edgestitched. The shoulder seam is topstitched at 3/8 inch with the seam pressed upwards toward neckline.


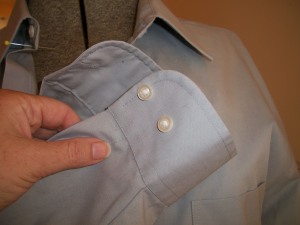
The outer edge of the cuff is at 1/4 inch. The inner edge at the wrist looks to be twin needle-d at the edge and 3/8ths. If you look you can see that the placket is edgestitched on only one side with the folded side left free of any stitching.


The button side of the front opening has a single row of topstitching holding down the folded material at about 1 inch. The buttonhole side has 1/4 inch topstitching holding down the bands.

The hem is a rolled hem with edgestitching starting right at one garment edge and continuing to the other end.


Attaching a Skirt to a Divided Yoke:Sewing Tutorial

Wherein I Sew Construction Paper

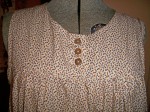
A lot of nightgowns and little girl’s dresses utilize the divided front yoke.  It is a yoke that overlaps and separates allowing the wearer to pull the garment over her head.  Most are closed with buttons.  Here is an example from a recently sewn granny gown.

This is from Kerstin Martensson's book "Beautiful Lingerie". You can see where the yoke is divided.

Warning Let me warn all of you experienced seamstresses right now, for the remainder of this post you are going to think, as my daughter says, “I already knnneeww that!”

But when I was a newbie making what appears to be a simple dress front would have presented some problems for me.  I have never seen an instruction sheet that clearly illustrates what you need to do here.  I would have taken it to heart that I didn’t know what to do and felt very discouraged. 

The remainder of this post is a short tutorial for very new sewers.  If you are stymied by attaching a skirt to a divided yoke I will show you in photos what I do.   I have used construction paper to simulate fabric and I will go step by step.  Though there are quite a few photos, when you are sewing it is a quick process.

Let’s get started.

Attaching a Skirt to A Divided Yoke

1. Sew facings to yoke fronts, turn seam and press.


Sew your facing to the yoke front. Most instructions will include the back yoke in this process but I have left it out for clarity's sake.

2. Overlap yokes at front.  Use a long basting stitch.  Start a half-inch or so before your overlap and end a half-inch or so beyond the overlap.

Yoke fronts are turned, pressed and overlapped.

3. Now the skirt must be attached to your yoke bodice.


Your skirt will have to be attached to the yoke.

4. But you have a problem.  There are these folds in the way. 

Your yoke seams have created folds in the fabric.

5. No matter how you flip your yoke you can’t get a full seam.


You push your material one way and another but you can't get a continuous seam edge.

Start snipping


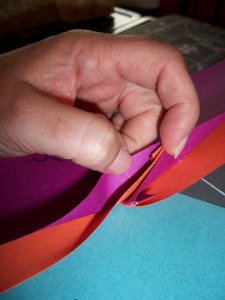
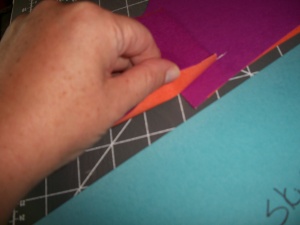
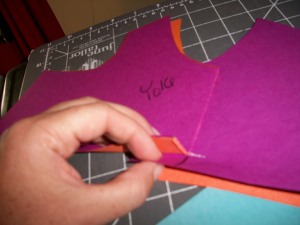
6. Snip the inside portion at the fold.  Normally I cut up to my basting stitch as it usually has the seam depth I desire.  Snip the outer yoke at the fold, again up to the overlap basting stitch.


Snip the inside yoke fold up to the basting stitches.

Snip the outer yoke fold to the basting stitches.

Now you did all this.  And you still can’t get a full seam.   You are still annoyed!  What is going on?

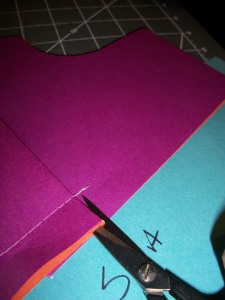
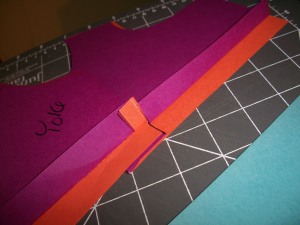
You have snipped your folds but still you are unable to get a continuous seam edge. You can barely see it, but where I have drawn the black line, snip that. Again cut to the basting stitch.

7. Look at the black line I have marked on the yoke front.  On the yoke front only, not the facing, cut along that line up to the basting stitch.


Now you can fold the fabric back and see that there are two continuous edges for a seamline 🙂

 What a relief!

In three simple snips you have a seam edge!

Now You are Ready to Sew Skirt to Yoke

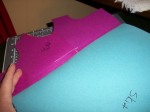
8. Fold back your facing so it isn’t caught when you stitch the skirt to the front yoke. 


Fold back your facing so it doesn't get caught in your stitching. Then lay the skirt and front yoke wrong sides together and sew.

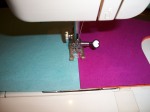
9. Wrong sides together sew your skirt to the yoke front.  And voila!  You have attached your skirt to the that bedeviled divided yoke.


Skirt attached to Divided Yoke.

All That is Left to Do 

 Finish the Inside Facing

10. Now finish your facing.  Flip to the inside.  You may have serged your facing edge, or you might want to turn the raw edge under. 


Flip garment. Press seam edge up into the enclosed yoke. Then lay facing flat covering seam edge. Facing may have its own edges serged or folded.

11. Then a typical finish is to stitch in the ditch from the front to secure the facing on the inside.


Stitching into the seamline from the top, called stitching in the ditch to secure inside facing.

 12. Here you see it.  Facing secure.  And you can remove the basting stitches if they still show.


Normally the edge would be serged on my garments. Here the facing is secure and the basting stitches are ready to go.

Three little snips. 

Problem solved. 

A long read for a quick solution but I hope it helps any newbies who have gotten waylaid at this step in their sewing.

Next Post: Tuesday, September 21, 2010;Slips and Camis from the Martensson Book

Previous Older Entries