Tip:Using the Lines Printed on the Cutting Board as Guides

I have always been a tad lazy, but apparently not lazy enough because it has taken me years to cotton onto this one.

If you own one of those fold-up cardboard cutting boards they come with a grid.  Heretofore I have only used it to measure yardage and to cut on the bed.

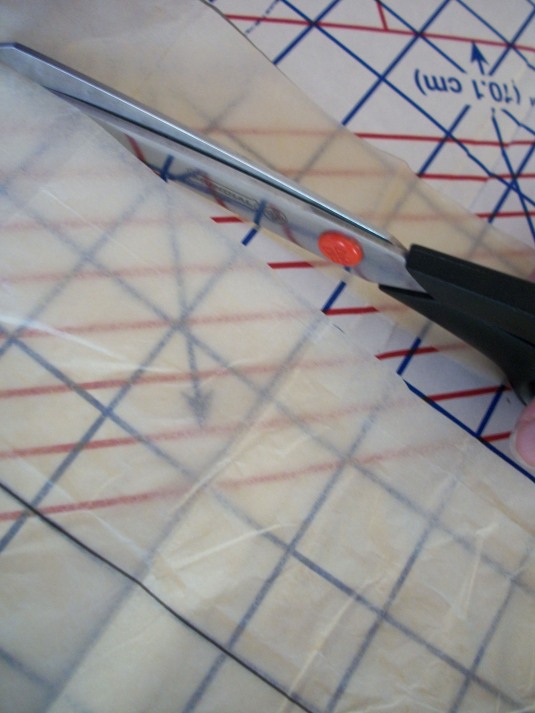
Recently when I wanted to narrow a tie band collar but didn’t want to take the trouble of marking lines on the pattern –  I noticed something.

You can see through pattern tissue onto the gridlines

I have the center line of tissue on one line and I counted three blocks over and cut along that line for an even three inch cut line.

The center line of the band was clearly marked on the pattern tissue.  I wanted three inches to either side of the center.

I lined up the center line and counted over three grid squares and followed that line for my cut making sure that I kept the center line positioned. 

And you know what?

There are a lot of other marks on this thing too. Put there for my utilization!

Mine is a Dritz Superboard I think. Along with a basic one-inch grid it has diagonal and curved lines.

And to think I once only thought it was good for cutting on the bed.

Next Post: Tuesday, September 14, 2010;My Stash Bash


Tip:Fold Pattern Pieces With the Info on Top

Patterns often have a lot of design options or include an entire ensemble wardrobe.  That makes for a gazillion pieces of tissue paper that you must cut, fold and then try to get back into the envelope as best as you can.  After shoving them all in you breathe a sigh of relief.   Then a few weeks, months, or . . . ahem . . . years pass and you get a siren’s call to sew up one of those designs. 

Now you have to pull out all of those crinkled tissues and unfold them to find the ones you need for your current garment.  This can be tedious.


But you can relieve yourself of some of the hassle by practicing one small step. 

After you initially cut the pattern pieces fold them so their info is on top before you place them back in the envelope.

You can clearly read that this is Piece #1 and the bodice front.

That’s it. 

When it comes time for you to pull your pieces out of the envelope you can quickly sort which ones you will need.

This small practice has helped prevent countless tissue paper tantrums in my life.

I hope, that in some small way, this tip is of service to you.

Next Post: Tuesday,April 27, 2010: Butterick 5041 Yoked Skirt:Pattern Review