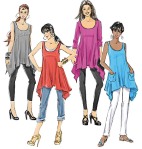
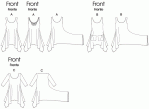
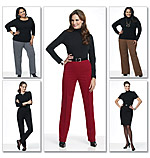
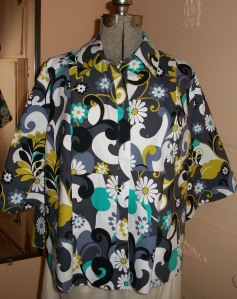
Pattern Review: Butterick 5610 Yoked Tee with Pleat Detail, Option A

Butterick 5610: Yoked Tee with Pleat Detail

Butterick 5610: Yoked Tee with Pleat Detail

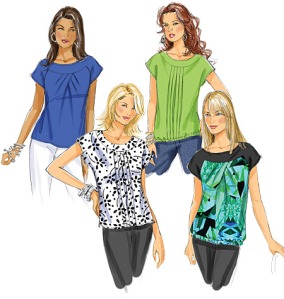
I bought this pattern a year or two ago because I like the yoke that stretches into a cap sleeve on Option A.  Using two remnants I cut a wearable muslin this summer and it has sat in my sewing drawer until now, five days before Christmas.

http://butterick.mccall.com/b5610-products-13751.php?page_id=875&search_control=display&list=search

Pros:

  • Solids, prints and colorblocking are all treatments that this design serves equally well.

Cons:

  • I couldn’t get the overlapping pleat detail right.
  • Other reviewers have commented that the neckline is a boatneck and may not cover your bra strap, but I did not get that far in construction.

Some Assembly Required:

The pattern instructions do not offer the flat assembly method which you can do with this top despite the yoke extending into the sleeve cap.

My Problem with the Pleats

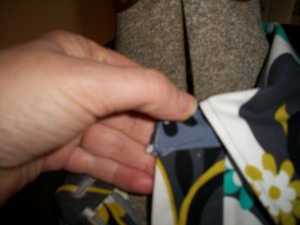
pleats in pastel fabricI sewed the pleats down per the pattern instructions, three on one side and two on the other.  Then when I went to sew the middle pleat I did it as I thought it was marked on the pattern. But the effect didn’t look right when I sewed on the yoke.  There was no overlap.  So I seam ripped and tackled the pleat again.  I looked again at the pattern instructions and the pattern markings and tinkered with pins.  An overlap was finally created but I was disappointed in that it was not the strong detail as drawn on the pattern envelope.  It really was unremarkable. Additionally the bodice was now too small to fit the yoke.

Fabric:

I used two remnants from other sewing projects.

Finetuning:

I felt like this was one time the pattern companies could have broken down a bit and told you what it would be like to sew this top, such as “here the third pleat crosses the …”  Also the markings on the tissue itself weren’t very clear.  All of the pleats had the circles to match up and the arrows showing direction of pleat.  But the crucial center pleat kind of went off into nowhere.  The center front was marked with a four inch line, but was I to sew my pleat to it or was it just there for reference?

Will I Sew it Again:

Not as the pattern instructs.  I nearly had it packed for a trip to the donate box at the thrift store but I looked again at the yoke/sleeve cap which had attracted me to the pattern in the first place.  The yoke creates a strong horizontal line accentuating the shoulders and drawing attention towards the wearer’s face.  I might take the bodice, draw out the pleats and use simple gathers to match it to the yoke.

I am too disgusted right now and have a lot of other sewing projects pending to play around with the above idea.  This summer I might give it another chance.

Advice to Others:

I don’t have any except, if you take a chance on this pattern, make sure you purchased it at a deep discount sale.


Overall Style Grade:  B, the pleat details are interesting but they have been around a few years.  But even so, pleats are still current and the design could be very flattering, especially to pears and apples who need the shoulder detail.

Results Grade: F, for me since I did not complete it. Others who have completed this top successfully can be found on sewing.patternreview.com.
signature in peach cropped

Pattern Review: Butterick 6659 Option F Girls Short Pajama Bottoms

Butterick 6659: I am using Option F, the baby doll PJ bottom.

My daughter likes to wear shorts and a t-shirt to bed.  This year we had plenty of tees, but few PJ bottoms.  To keep her from parading around the house in her unders, I decided to sew up some quick pajama shorts.

Previously I had made a nightgown from this pattern and was on the verge of discarding it, when I thought that it could easily be graded up slightly, (the original being so oversized,) and I might be able to make the panties into shorts by omitting the elastic at the legs.  Why buy a fresh gym shorts pattern when I already had essentially the same thing.

I also had a laundry basket of discarded summer tees.  For once, I had the spare fabric to finally perfect fitting the crotch seams for my daughter – something I can transfer to other patterns. 

The pink shorts are the RTW pair that I want to emulate. The first try at the unaltered pattern is the yellow pair and you can see how much larger they are than the RTW. The yellow pair bagged in the front waist when my daughter tried them on.

Pros:

Though this pattern was cut for a size 5, it easily fit my 6X/7 Slim sized daughter.

Very few seams making it a quick sew.  One for which you soon have a finished project and have not expended a lot of mental attention – perfect for mothers of young children.

One pattern piece along with a cut of elastic.

If you only have five or ten minutes to sew, you will be able to cut and sew this pattern in just a few sessions.

Cons:

If your child is a tricky fit there aren’t a lot of seams to work with.

The pattern sizing – sigh!  Has no one in the industry redesigned children’s patterns to match RTW?  The waistline of this pattern is at the natural waistline while my daughter and her little friends barely know where their waists are located.  They all wear their pants at the navel and I consistently have to adjust children’s patterns to follow suit.  This one is no exception. 

The length of the lower hemline option seems much too long to me.  Again little girls wear their gym-style shorts upper mid-thigh rather than towards the knee.

I didn’t dare try a 4-line stitched elastic waistband as the elastic grows and distorts whenever I try this.

Some Assembly Required:

I sewed the crotch seams, then inserted the elastic waistband.  The original RTW shorts I was copying have a 4-line stitching of the elastic.  I find the elastic grows and stiffens if sewn over so many times, so I settled on the simplest elastic application. 

Fabric:  Old T-shirt fabric.

Finetuning:

Sadly my serger appears to be going kapoot, so I did not serge the seams.  Instead I did a double line of zig-zag stitching.  It isn’t the most professional inside finish, however the material is knit so it won’t ravel.  And old t-shirt knit at that allowing me to more easily justify the simpler finish .

The final pair and how they compare to the original pink RTW. Much better.

Will I Sew it Again:

Yes, definitely.  I finally got the pattern adjusted to fit perfectly.  Now I only have to grade up for at least the next two sizes.  

Advice to Others:

I sewed four pairs in all but one has gone missing.

Use an old tee to make the practice muslin if yours are wide enough for the pattern piece.  And if you do use a t-shirt, utilize the RTW hemline for the shorts hemline saving you an extra step and making the garment look more RTW, as I have always found that the standard mechanical machine’s zig-zag stitch does not much resemble a RTW finish.

Overall Style Grade:  Um, A – I guess.  This is such a classic that it hardly seems a style.

Results Grade: A, after you finetune the fit, you will get consistently good results.

Pattern Review:McCall’s 5678 Baby Sling Option B

McCall’s 5678 Baby Sling Option B

McCall's 5678 Baby Slings

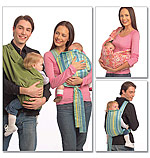
Option A, the green one the man is wearing, does not look like you can free your hands so I didn’t bother making it.  I have something a friend gave me, a serendipity wrap I believe it is called, it is about twelve feet of bright batik green fabric; if you wrap outdoors the fabric drags on concrete and my husband will not wear it because it the print is too feminine.  (But I included the  link just in case it works for you as it looks really cool on the babywearing site. ) Baby is approaching separation anxiety stage meaning I have to wear him to get anything done.  Option B looks like a rectangle with ties attached and I thought it would work up quickly and allow me to use up some of my stash.   Also my hands could be free at least some of the time.

Pros:

  1. After you make the first sling, you will find ways to shorten the process.
  2. You can make several in different fabrics having fun with various print and color combinations.
  3. It is washable.
  4. It can be adjusted to fit each individual unlike some of the commercial baby carriers where once you have the straps adjusted it is a pain to readjust if you want your husband to carry the baby for awhile.
  5. Your hands can be free some of the time, at least long enough to use a broom or mop.
  6. After you learn the technique it makes a great baby gift, though you will have to teach the recipient how to wear it, and remind her that it can only be used after the baby is 4 months old and can hold up his/her head well.

    Clearly I wasn't prepared for a photograph and I had to hold the camera at a strange angle but you can see the denim sling and that it does safely hold a baby.

Cons:

  1. Looks are deceiving.  This is not a beginner project.
  2. The instructions make it take longer than need be.
  3. The body is sewn like a pillow right sides together. On the final sew-around all four straps plus the padded top are shoved to the inside and keeping all of that stuff out of your line of seaming can be tricky.
  4. Babies have strong opinions on their slings, and you could spend the time making it to find your baby hates it.  My firstborn hated every sling we tried, but I had not used one like this which resembles a mei tai sling. (Here are some photos of that type.)
  5. You cannot bend forward with this sling.  You must bend at the knee with your back straight.  This is tiresome when doing certain household chores.

Some Assembly Required:

The instructions have you baste the fleece onto the straps before completing them.  Do it per the instructions the first time, but after that an intermediate sewer will quickly see how it can be done in one pass.

I took the extra time and basted the fleece onto the body both times as it is several layers of sewing on this piece. 

After inserting straps and padded top, create a double line of seaming topstitch the straps down inside the body for extra strength.

Fabric:

The body can be a bit stiffer than the straps but regular cotton will also do.  I recommend quilting cotton for the straps as you will be tying these and will need some pliability. I used denim and batik for the first sling, and a fanciful quilting cotton for the second.

The second sling in fun fabric. I forget who gave me this fabric with a print of dogs posing as cowboys but this is the only use I can imagine using it for.

Finetuning:

I used some of my stash for these two slings, but finding yardage long enough for the straps was a bit hard.  You can piece the straps towards the ends, but I would want one solid piece near the body.

Will I Sew it Again:

Maybe.  Depends on how long these two last.  I have a friend who is pregnant and I hope it is a little girl as I am dying to make one of these up in coordinating girlie pink fabrics. 🙂

Advice to Others:

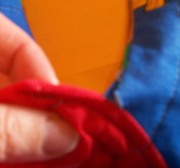
You must give me grace because the baby kept hitting the camera though it wasn't quite this blurry on my digital screen. Hopefully you can still see my mistake where the red doesn't quite meet up with the blue. I should have taken more care in pinning and cleaning up the edges of my strap.

Remember after you sew the straps to tidy up the edges or you may have some skips in your seaming because your stitch line just missed the fabric edge. 

Mark the top of the body because once you take off the pattern you won’t be able to figure it out.  It is a little counterintuitive but the smaller end goes on bottom, so the baby’s legs can stick out, and the larger side goes on top to surround the baby at the shoulder.

If you have a post-partum abdominal separation (diastis recti) or weak upper back muscles you must remember to pull your shoulders back and down, and your bellybutton up and in when wearing the sling.  Check out Julie Tupler,  a physical therapist who helps pregnant and post-partum women get back into shape and reduce their bellies.  She warns that care must be used when wearing front carry baby slings.

 Overall Style Grade:  A, This could be very cute, especially if you bought some designer quilting cotton.

Results Grade: A, for advanced beginners or beyond.  If I were new to sewing I might find it a bit frustrating.

Maternity Sewing:McCall’s 6074 One Hour Knit Dress:Pattern Review

McCall's 6074 One Hour Knit Dress

Prior to my pregnancy I had seen this pattern and skipped it because I thought it would enhance my prominent belly.  It may, but now there is no way to keep attention off of my belly, so I gave this pattern a second look and thought it would be quick and easy. 

Pros:

It is quick and easy.

It can be shortened into a top, or worn long for a dress. 

I did not measure the time involved.  It may not be as short as an hour, but it certainly does not take long to construct.

The design is basic and lends itself well to trendy fabric, fancy embellishments or cute little summer jackets.

Though the design may not hide your belly, it does enhance the waist quite nicely, especially if you are short-waisted.

Cons:

The neckline can be too low for some.  You may want to raise it if you do not plan to wear a cami underneath.

There is a great deal of hemline.  The knit you choose must be stable enough not to become wavy as you sew.

Some Assembly Required:

I added quite a bit at center and to the bottom front hemline.

The wearable muslin I cut per the pattern tissue, but for the turquoise knit I added quite a bit to the front.  I also dipped the front hemline so that it was asymmetrical allowing the hem to straighten as my belly increases.   I am seeing front dropped hems in fashion mags so per current trends it looks deliberate.

Fabric:

The wearable muslin was made in a tropical poly knit found at the thrift store.  I use the completed dress as a coverup for the pool.   The turquoise dress is of cotton knit bought at Banasch’s during one of their sales.  The knit is opaque with a nice weight that drapes and swings well.

Finetuning:

McCalls 6074 Wearable Muslin

When I added the extra material in front to accommodate my belly, I added weight to the front of the dress.  That pulls down the neckline farther than I would like.  On future dresses I am going to raise the neckline.

Will I Sew it Again:

Probably.  I am on to other projects right now, but I do like this design enough to consider it a summer classic.  I will most likely put the pattern aside and then pull it out next spring for some easy summer dresses.

Advice to Others:

The ladies in pattern envelope drawings always seem to have very long collarbone to neckline heights.  If you have a short to average upper rib cage length, or are just modest, raise the neckline.

Choose a stable enough knit for the hemline to look nice and straight.  Some of the trendy knits tend to wave and curl as you sew them.  Find a way to deal with this if your heart is set on an unstable knit.

Overall Style GradeA, for being an easy summer classic that will allow the home sewer

McCall's 6074 in the final fashion fabric.

to adapt the look with trendy fabric or embellishments.

Results Grade: A,  when you want to churn out something quick and easy this satisfies the bill.  The only thing a new sewer may encounter to trouble her is the elastic, but that is easily marked with chalk.

Maternity Sewing:Kwik Sew 3324 Maternity Pants for Wovens:Pattern Review

Kwik Sew 3324 Maternity Pants for Wovens

Unsuccessful in my early experiments with altering RTW pants I decided to seek out the real deal, an actual maternity pants pattern. Several pants lengths were provided along with instructions on putting a maternity panel into RTW jeans.  Unfortunately Kwik Sew patterns are never on sale or at reduced rate.  However I have found the fit usually to be good, the pattern paper holds up to a lot of use, and few pattern makers are offering much in the way of maternity – so I forked out the money for retail price.  It was worth it.

Pros:

If you know how to make pull-on pants these aren’t much more difficult.

The instructions suggest using rib knits for the maternity panel, and so far in my experience, that fabric has provided the best stretch and recovery.

This pattern upholds Kwik Sew’s reputation of offering simple to sew and well-fitting patterns.

Cons:

Flat assembly will not work.  Bummer for me and other enthusiasts of this technique.  The maternity panel comes in two parts, front and back, which are sewn together before adding onto the pants themselves.  That means you must assemble the pants fully, then encircle them with the knit panels.  Not too hard, but as a new sewer I might have felt a bit frustrated trying to pin and manage the fabric in this way.

The panels also have elastic which is applied to the middle of the bands, then the band is folded over.  Newbies might have a hard time keeping the elastic in the middle of the fabric.

Some Assembly Required:

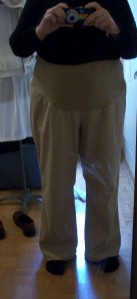
Kwik Sew 3324 Maternity Pants: Honest, I did not notice that big smear on the mirror before photographing. I didn't lighten either. I hope you can see the pants. These legs are narrower than the pattern's original cut. I left in some slack in anticipation of some last trimester bloating.

For once I followed the pattern instructions and assembled each leg separately, then placed one leg in the other and sewed up the crotch. 

Sew the maternity panels together at side seams, apply elastic down middle and fold over.

Now sew the panel to the pants matching side seams.

Hem those suckers and you’re done!

Fabric:

Pre-pregnancy I bought several pieces of fabric in anticipation of a big spring sewing session.  When I heard I was pregnant I nearly folded up all of that fabric and put it away for a year or two as it was nice (and sometimes, expensive) fabric and I knew my maternity clothes would only be used for a short time.  Then I remembered how much wear maternity clothes get and I thought if I ever needed the pick-me-up of wearing nice fabric it was now. 

For these I used menswear cotton gabardine in khaki bought at Banasch’s, the only independent  fashion fabric store remaining in Cincinnati.  The fabric looks like what they sell in RTW and it wears beautifully with only minor wrinkling that seems to fall out over the day so I never look crumpled. The material wasn’t cheap, but it wears and sews so terrifically that the extra expense was worth it.   I am also glad I went ahead and used this fabric on my maternity pants as it is a delight to wear even if it is getting harder to see my legs past my belly!

Finetuning:

These are full straight pants legs which may seem a bit dated to you.  Boot cut the legs.  In a future post I will show you how I made that alteration to these pants.  I liked the cut much better after the legs were thinned up.

The other thing I can do next pair is cut them a size smaller.  WooHoo!  (That never happens to me!)  Right now the pants are a little loose, but I imagine they will be terrific in those final weeks when I am bursting out of everything else in my closet.

Will I Sew it Again:

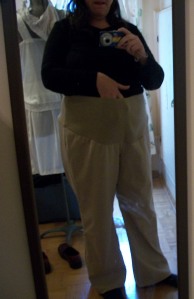
Kwik Sew 3324 Maternity Pants:Here I am trying to get an idea of fit when my belly reaches maximum. The legs don't seem so loose then and the boot cut is more apparent.

Yes, what choice do I have?  I need maternity pants.  These are quick and easy.  Not glamorous, but sufficient and they don’t require that I sit at the machine for hours, something which I don’t have the stamina for right now.

Advice to Others:

Before inserting the elastic into the maternity panel, fold the bands over on themselves and iron in a crease that shows your midline.  Lay the elastic to one side of the midline, not on the line – but beside it, and follow the line as you sew.  That way you will be able to fold the panels perfectly in half when it comes time to apply them to the pants.

Overall Style Grade:  B.  Folks tend to be quite forgiving of the sartorial choices of pregnant ladies.  That grace will be sufficient to make up for any lack of au courant these pants may display.

Results Grade: A.  No pockets or zippers.  Just two legs and a knit panel.  A beginning sewist who finds herself knocked up should be able to create a perfectly passable pair of pants from this pattern.   The more experienced could doll them up a bit with pockets or other details, that is if your nausea doesn’t make you too impatient.

Next Post: Tuesday, May 10, 2011: Altering a Straight Pants Leg to a Boot Cut.

Maternity Sewing:McCall’s 6121 Asymmetric Hemline Knit Top:Pattern Review

McCall's 6121

During April’s big sale events I had a gorgeous time leafing through the pattern catalogs looking for standard patterns that could be easily altered for maternity wear.  Normally I would bypass this pattern as too unstructured but since loose and flowing is now my goal I bought it for dirt cheap and quickly made a practice muslin.  The practice muslin I will not be showing you as it was sewn in that super-gnarly see-through Walmart knit, but I do have a picture of one of the final tee’s, and I have another on the cutting table ready for sewing over the next few days.

Pros:

Super easy to construct.

Standard pregnancy patterns for tee’s are often of the boring, crewneck variety with a boxy matronly cut.  The asymmetric hemline is refreshingly fashionable. 

If in the last trimester you grow past the first hemline, you can add a simple band at the bottom to extend the length. 

McCall's 6121 Pattern Illustration:See the hemline is just a straight line. You can easily add a band for additional length if desired.

It is a basic tee at heart allowing for embellishments of your own at the neckline.

With the right figure and the right fabric it can work as a dress.  Paired with a small heel it would be especially lovely.

McCall's 6121 in stretch lace. The folds show best in natural light so I purposefully did not Photoshop or lighten this image.

Cons:

Option A, the lady in red is wearing a tank underneath the fashion pattern.  That tells you that the neckline falls quite low on the chest.  I raised the neckline to securely cover both boobs and bra straps.

Leggings or skinny jeans may not be your thing, but this style works best with a fitted bottom.  Worn with a standard trouser and it may start to look frumpy.

Even using knits from a wide bolt, the sides of the pattern extended past my fabric edge.  Make sure you tidy up the edges by cutting off the selvedges neatly before sewing so you have equal widths across the back and front.

The armscye is a bit high and narrow for fuller arms.  The knits stretch over my arm the same degree as RTW, so I haven’t bothered to alter this as I would normally.  If you have fuller arms you may want to add a some width and lower the armscye.  Do a practice muslin and see how much this bugs you.

Some Assembly Required:

McCall's 6121 in stretch lace.

Call me lazy, I serged the whole thing.

Shoulders first.

Neckline.

Hems next because I had two different lengths, shorter in back and longer in front to accommodate baby. 

Then side seams and,

finally armscye.

Fabric:

I used a stretch lace acquired from Jo’s bargain table.  I think it will be cute in the summer as an overlay for tighter fitting tanks. 

The problem I encountered was that the Hello Kitty machine can be fussity with such fabrics, waving the hemlines, and when it is feeling especially kittenish, pulling delicate fabrics down into the throat plate.

Knowing that this top is not meant to last the ages I serged the hemline, neckline and armscye and left it at that.  The serging looks nice, somewhat like a ribbon edge from a distance, and most importantly, the edges are clean and undistorted.   Bypassed Hello Kitty entirely on this one.

Finetuning:

When you raise the neckline you will also raise the hemline.  Consider putting those inches back onto the hem. 

When you raise the neckline at the shoulders you will decrease the armscye circumference.  Add those inches back at by lowering the underarm.

Will I Sew it Again:

Yes.  It is very easy and will allow me to generate a lot of tops in a small amount of time.  This is a blessing since pregnancy often means cobbling together an entire new wardrobe.

Advice to Others:

The pattern can only be cut from 60 inch knits.  Nothing else will do to get the swishiness around the legs that you need.

The loose folds will allow for some imprecision, but the neckline is the focal point and you don’t want that to scream homemade with a wonky finish.  Beginning sewers may just serge/zig zag and turn under the neckline and armscye edges, but if possible try to familiarize yourself with applying a knit binding to those edges.  It can even be made of the fashion fabric versus buying a special rib knit for that purpose.  It isn’t in the instructions but it will upgrade the look of the shirt.

Overall Style GradeB.  Credit for the asymmetric hemline, but I don’t know how stylish very oversized tees are right now.  Better than plain tees from the maternity shop, but it doesn’t take one’s breath away either.

Results Grade: A.  Easy to achieve a good result.  The bottom slope of the side seams can even take some imprecision since the seamline is hidden in the folds of fabric formed by the excess. 

Next Post: Thursday, May 5, 2011: Kwik Sew’s maternity pants pattern for wovens – nicer than I imagined!

Butterick 5539 Knit Pull-On Pants:Pattern Review

Butterick 5539 Knit Pull-On Pants and Skirt

I bought this pattern pre-pregnancy because I liked all of the variations, going from near leggings to full pants, with a simple skirt pattern included also.   After looking at a maternity knit pant pattern from Kwik-Sew which I thought looked dated, I decided to pull out the Butterick and see if it could be altered for pregnancy.  I am glad I gave it a try because I like the results. 

Pros:

  • What could be easier than knit pants?
  • Great beginner project.
  • As the overall construction is so easy, basic knit pull-ons are a great way for new sewists to learn how to fit a comfortable crotch that is customized to their figure.

Cons:

As I have a thick waist I cut the waist at the largest size and went down two sizes for the legs.  I made option B, but the legs came out more like option C.   The pattern gives more ease in the leg than the pictures would indicate.   Make a practice muslin, but you may need to cut the leg a smaller size than you would normally.

Some Assembly Required:

Since I am inserting a maternity panel I did not follow the pattern instructions.  They advise constructing each leg, then inserting the one leg into the other and sewing the crotch seam. 

    1. I sewed the front crotch, then laid the front portion flat and sewed on the maternity panel.
    2. Then I sewed the back crotch.
    3. Sewed side seams next.
    4. Did my hem – completely out of the normal order, but I found that the knit stretched less when it was lain flat.
    5. Inside seams next.
    6. Lastly I serged on elastic to the right side of the waist which did a natural flip to the inside when it was finished.

I am short photos of the pants I made from this pattern. This is my favorite pair of pull-ons in fake denim knit. I also two others in black and gray.

Fabric:

I used a nicer quality plain knit in black and medium blue which I liked very much.  I also made two pair out of a slinky poly/cotton rib knit, a choice I somewhat regret as I never got the hems to lay flat.  They stretched and puckered badly.  I am thankful that they are at the bottom of my legs with a bit of fabric bunching around them my ankles as leggings do, so the hems are not very noticeable.

Finetuning:

Play around with tension and technique before attempting hems.  Or just serge them flat and call it a day if the pants are to be worn super-casual.

Will I Sew it Again:

This pattern is so quick and easy, and with the right fabric, makes a very inexpensive pair of pants.  If I grow out of this set of trousers I am going to whip up some more during the last part of my last trimester.  Given that it offers nearly every leg width fashionable, I may keep this pattern around and make it one of my TNT’s.

Advice to Others:

Make a practice muslin and see if the leg width suits you.  You may have to take it in.  If you are using a stiffer ponte or thicker jersey you may want to go with your size on the pattern.   But the softer your knit the larger it seems to look around the leg, so you may have to take those down a size.

Overall Style Grade:  A-, it doesn’t make the heart flutter, but with judicious fabric selection this basic pattern can be worn fashionably at all times.

 Results Grade: A, easy.  Great for beginners and a quick project for more advanced sewists.

Next Post: Tuesday, May 3, 2011: Have some Maternity Tops in the Works.

UFO’s: Which to Stick With and Which to Chuck?

The UFO's I found top of hand. I'm sure there are more secreted away in dark corners.

My craft decluttering has unearthed several UFO’s.  Many of them are quilting related as those pieces have stalled.  The Hello Kitty machine suffices for garment sewing, but does not allow me to drop the feed dog for freehand motion quilting, nor is the arm large enough to wad a quilt underneath. 

I have a hard time making decisions on quilting supplies and projects.  The scraps seem eminently useful.  But they tend to add up to behemoth piles of fraying pieces.   Even if I don’t like how a quilt top is turning out I tend to go ahead and finish it because I think to myself all that I am learning.  And I am at least putting that fabric to practical use.

But with baby on the way and all of our spare funds going towards doctor’s bills and home repair, I need to make some hard choices. 

What projects do I stick with and which do I chuck?

Serendipitiously I came across this little book at the library the dip:A little Book That Teaches You When to Quit (And When to Stick) by Seth Godin.

The Dip: A Little Book That Teaches You When to Quit (And When to Quit) by Seth Godin

Seth Godin is a business writer and you might imagine he doesn’t have much to say to crafters.   But it is a cool little book and I found it very apt.  Some of the reviewers on Amazon said that they thought sticking through the rough patches was general knowledge.  It is.  But sometimes you really need to know when to quit.

In the middle of a trying spell it is nice to hear a friendly voice urging you on, and additionally, providing valid criteria for when it is appropriate to quit and move on.

Pages 66-69 gives three questions to ask oneself in regards to quitting.

  1. Am I panicking?

  2. Who am I trying to influence? (As a crafter I think that can read; What is my Goal?)

  3. What sort of measurable progress am I making?

Godin points out that high emotion is not a good reason to quit as it becomes expensive to continue starting projects afresh.  

If the goal of my project is to learn new technique then maybe I want to continue even if the results are wonky.  But if the goal is to give as a gift and it doesn’t look gift-worthy, possibly scrapping and starting again is the better option. 

And what rate of progress am I making?  Is this the kind of project that crawls along, and is that acceptable?  Or do I have to finish in a short time to give as a gift, or to simply keep workflow going on other exciting projects?

One by one, over the next few days I am going to look at each of my UFO’s and run them through the above criteria.  I will fill you in on what I decide.

And I might read through this little volume one more time for emotional support. 🙂

Next Post: Tuesday, April 12.2011: Maternity Wardrobe Woes

Simplicity 2447: Yoked Princess Seam Tunic

Simplicity 2447

I was betwist and between on this pattern as I don’t much like the tunic shown on the model but I did like the line drawings of the other styles.  Given that there was a sale going on, I decided to give it a chance. 

Pros:

Other than the princess seam it is a basic blouse.

The different options show a basic blouse done several ways which means you can sew this pattern for either your summer or winter wardrobes.

Cons:

New sewers may find the princess seam tricky enough without adding detailing like pockets or ruffles.

There is a collar with stand making the neckline more complex than a simple collar. For some reason stands show off sewing irregularities so much more than inserting a collar directly into a facing.

Some Assembly Required:

I did my usual: assemble the back, assemble the front, attach front to back at shoulder seams, attach collar, apply buttonholes, insert sleeves, hem.

Simplicity 2447 Side View

Fabric:

The fabric didn’t work out.  I had hoped that the yoked princess portion would break up the print but it still looks rather overwhelming.  I don’t know if I am going to wear the shirt or not.  We’ll see.  Maybe when the weather is hot and sunny the print won’t feel so far out there.

Simplicity 2447 Front View: I thought that the yoked princess seams would cut up the intensity of the print, but I was wrong. I am not sure I like the fabric.

Finetuning:

My stand is a wee bit off on the button side of the placket.  All was good until the last centimeter.  When I saw the result I thought of ripping out, but even at that early stage I was beginning to have misgivings about the print.   I am not sure I will wear the shirt enough to fuss over an 1/8 inch awkwardness at a not very noticeable site.

Here is my stand that juts out from the edge too much. Should I have gone in and tidied it up. Yep. But I was already out of love with the fabric so I didn't bother.

Will I Sew it Again:

Yes.  I want to sew the tunic with the ruffle.  This time I am using a medium blue jacquard so the style lines will not get lost in the print.

Advice to Others:

If you use a print, be careful of what kind. 

Overall Style Grade:  B, not particularly fashionable, but then not unfashionable either, and a rather useful basic blouse pattern.

Results Grade: B, given the stand, princess seams and pocket detailing, there are greater opportunities for sewing errors, especially if you are new to those techniques.  An intermediate or experienced sewer will probably get an A result.  A new sewer may face some challenges.

Next Post: Thursday, February 24, 2011: I am going to make another version of this pattern, or I am going to start something new.  I haven’t decided yet.

Pattern Review: McCall’s 5052 Basic Shirt

McCall's 5052 Basic Shirt

 The fashion magazines are showing shirts without darts just as I was getting over that look anyway.  Fitted blouses are giving way to looser sportier styles so I went looking for shirt patterns that reflected that trend and found this offering from McCall’s. 

Pros:

  • Sleeveless, short, three-quarter, and long sleeve options.
  • No darts.
  • No collar stand.
  • It sews quickly.
  • Acceptable in many seasons since it will work with any lightweight woven from cotton to corduroy.
  • If you have a complex print you don’t have to add the pockets, and without darts, the only interruption in the print you would have to contend with is the front placket.
  • It comes out looking like the pattern envelope photo.
  • A good basic attractive in both solids and prints.

Cons:

  • Notch collars require some familiarity with collar application.  The notches must be even or everyone will notice.
  • If you are large-busted you may need to play with the button placement to eliminate gaps.  The pattern places the buttons three inches apart.  For those who routinely experience gaping,  mark your buttonholes every 2.5 inches and add another button at the bottom.


The shirt waiting for hems and buttons. Plan to finish up this evening. It is a very overcast day here and try as I might I could not get the lighting better and the photographed shirt has a blue tinge.

Some Assembly Required:

I have my own assembly line system that keeps me grounded.

At first the pattern pieces are at my sewing table with the tissue still attached. 

Prep for Assembly

  1. Back bodice-staystitch.  Set aside.
  2. Pockets – sew down top edge and iron down seam edges.   Set aside.
  3. Collar – sew collar to undercollar, grade seams, press, and topstitch.  Set Aside.
  4. Front Bodice – Mark Pocket placement with air or water erase marker.  Notch foldline of front placket. Staystitch neckline.  Serge inside edge of placket. 

Assembly

  • Attach front and back bodice at shoulder. 
  • Attach collar.
  • Buttonholes.
  • Sleeves at shoulder seam.
  • Sew underarm down side seams.
  • Hem sleeves and bottom edge.
  • Hand sew on buttons.

Fabric:

This is one of my few purchases of designer fabric.  The bolt end said it was Ralph Lauren when I bought it at a sale at Banasch’s, the only independent fashion fabric shop left in Cincinnati.  It is menswear shirting cotton and has that pleasant crispness. 

I choose it because it looked like shirting material I see in RTW.  However, sewing was not as easy as I assumed.  The denier is thicker than I expected and the fabric resisted pinning.  Sewing machine tension had to be just right and as you got more of the shirt assembled the stiff fabric kind of got in the way as you gathered it under the machine.

It is wonderful fabric and I expect it to wear a lot better than material I have bought at mass merchandisers, but don’t expect that better fabric is necessarily without its own idiosyncrasies.

Finetuning:

Given the stiffer hand of the fabric I did not interface.  I also like the summery-slightly-wrinkled look.  If you prefer crispness do interface.

Will I Sew it Again:

I have another cut in a royal blue shirtweight gabardine I found at Jo’s for 90% off making it $1.00 per yard.  But even with the one washing to preshrink the fabric length, I can see that the dye and weave are not as good as the white shirt.  Disappointing, but it appears you get what you pay for.

Advice to Others:

I made a practice muslin and the only alteration I did was a forward shoulder adjustment.  Even the collar opening wasn’t too low.  I know how to work a multi-size pattern to suit my figure.  If you too are familiar with changing sizes as you cut to suit your body type, you may be able to skip the practice muslin and work it up in a fabric that could potentially be a wearable muslin.

Overall Style Grade: B for Basic.  The design is not glamorous but it is a great basic to build upon.

Results Grade: A,  collars, pockets and front plackets – if you have a basic understanding of those applications, you should have no problem.

Next Post: Thursday, February 10, 2011: The Forward Shoulder Adjustment

Previous Older Entries